DIY Macrame Coasters

I LOVE these Macrame Coasters, one, they’re really really cute!! Two, you only need three things to make it, and three, they’re a great gift for anyone!

Here’s what you’ll need!
Sizers
Comb
Here are the sizes of rope you’ll need -
1 piece that is 12 feet long
6 Pieces that are 30 inches long
5 Pieces that are 22 inches long
6 Pieces that are 15 inches long
You can also cut a little extra as you go along in case you might need a little more to fill in gaps.
Lets Begin!!!
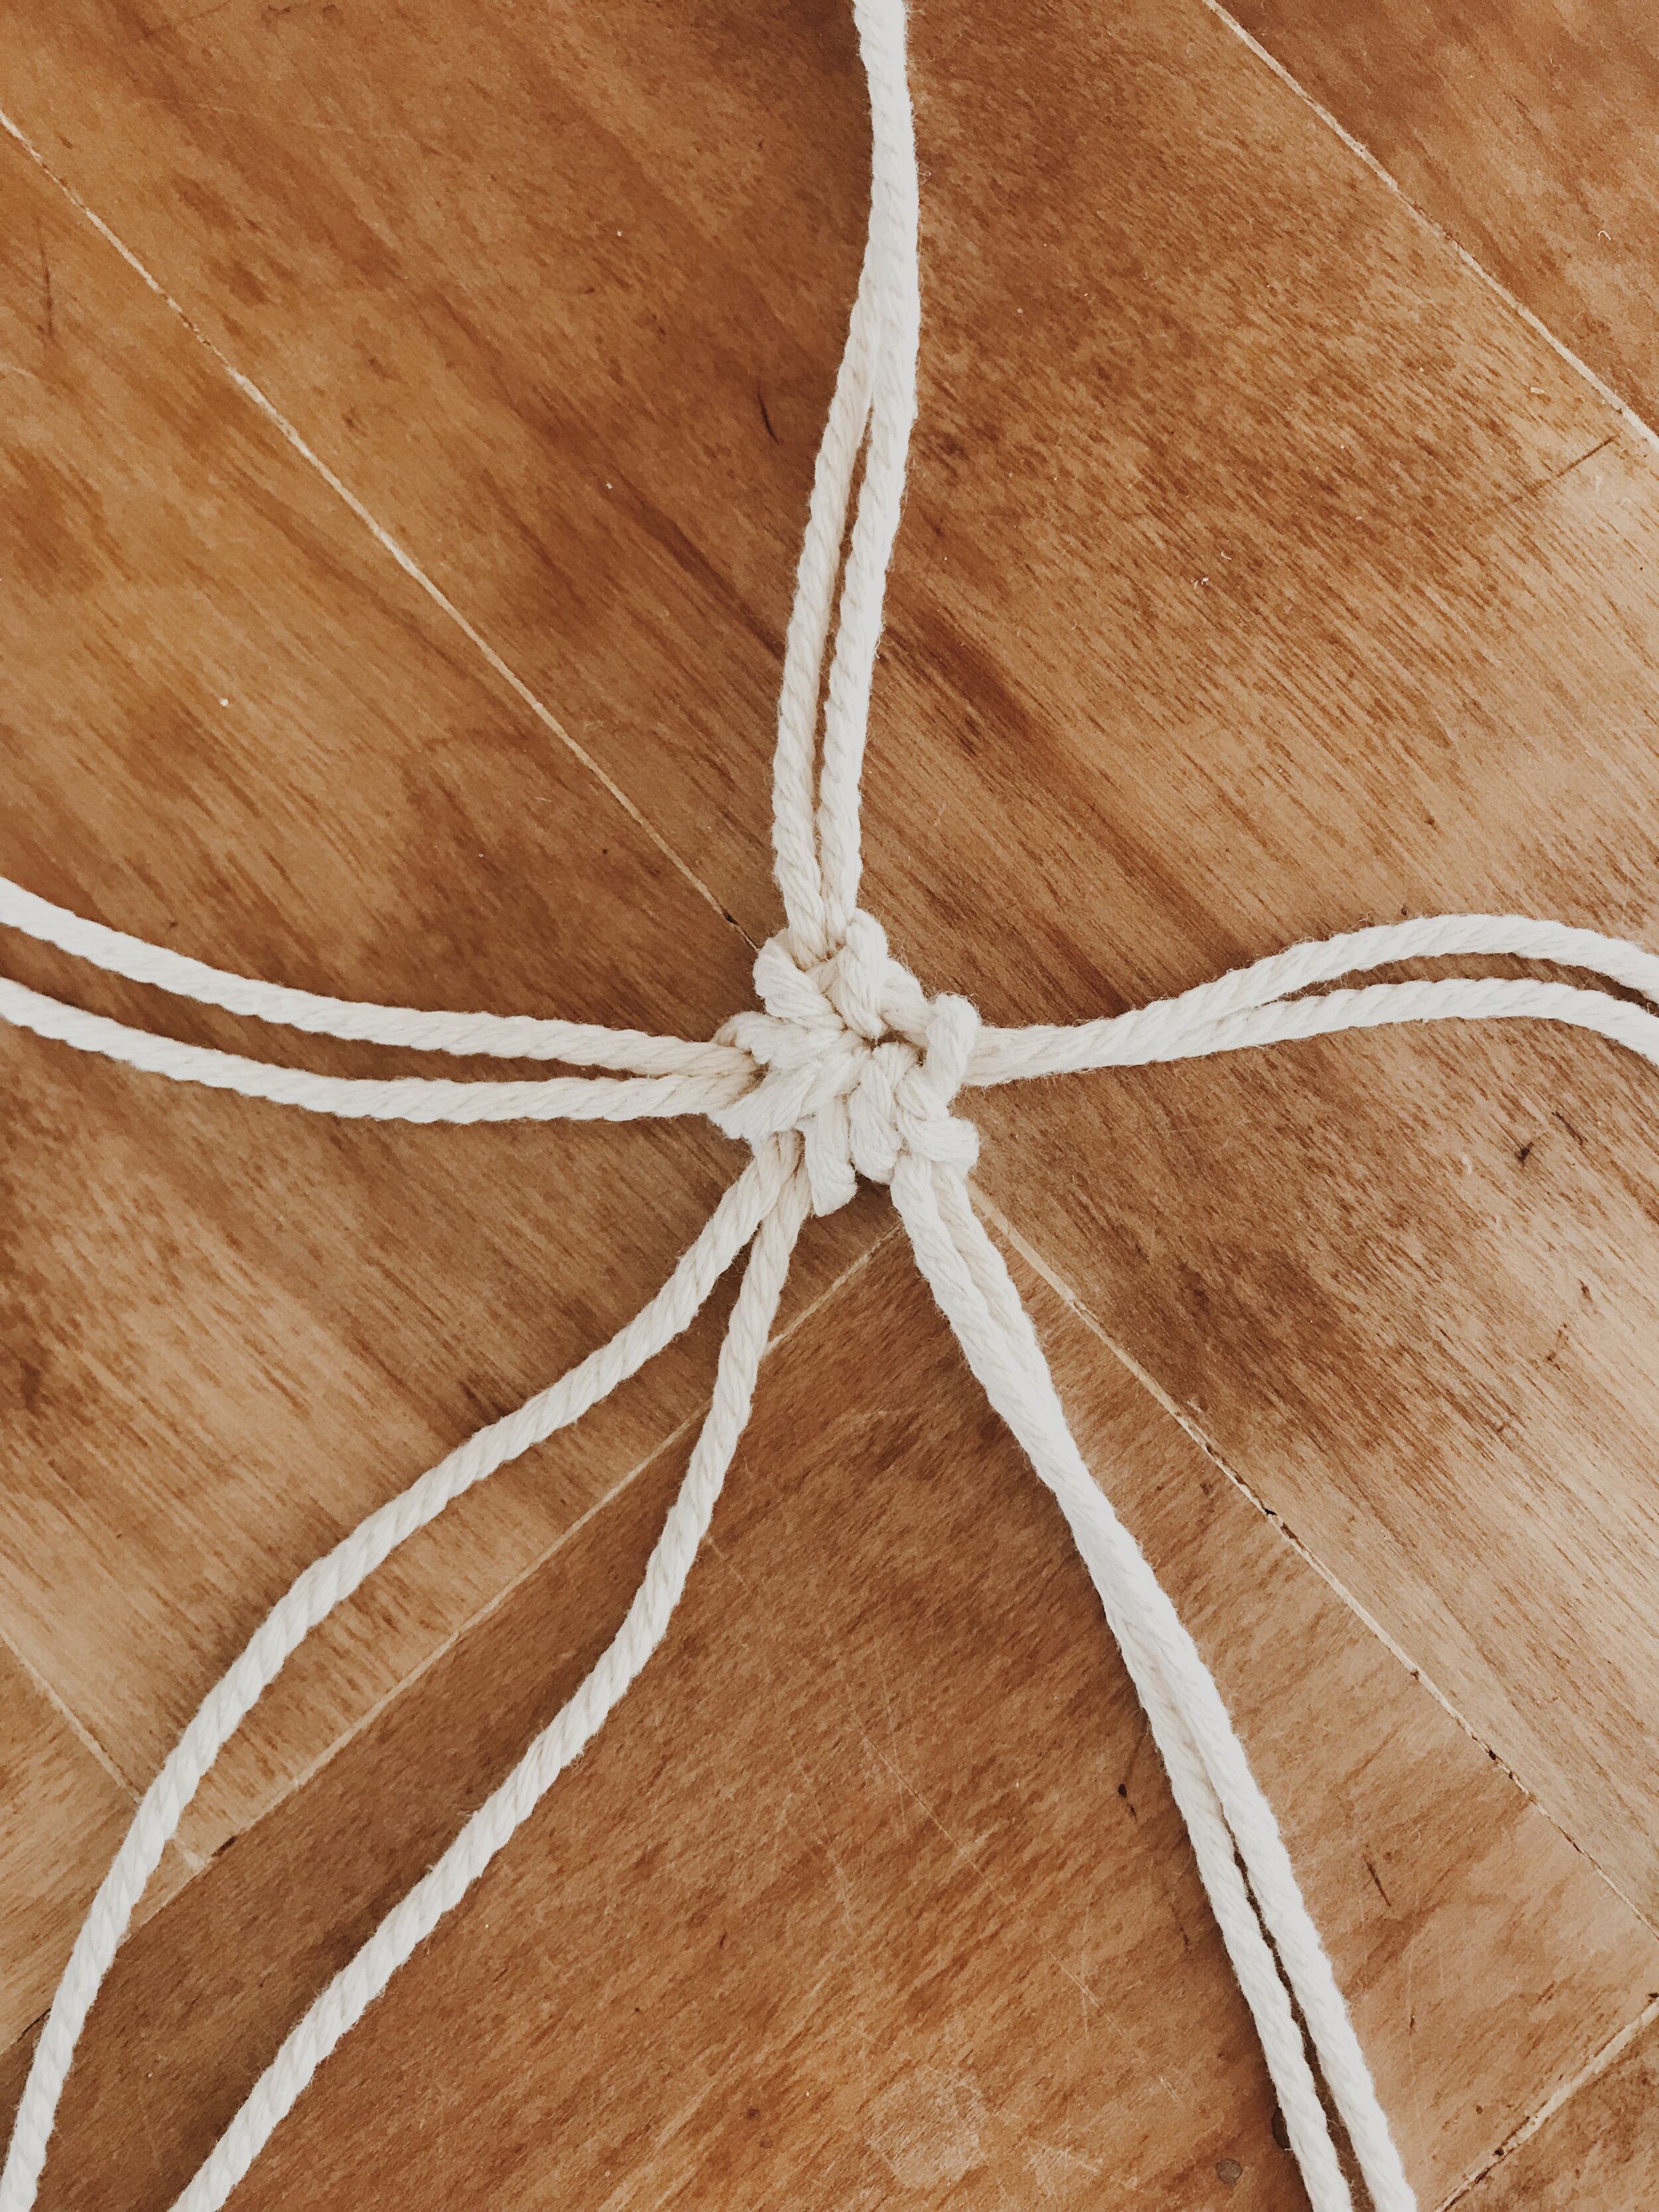
First- Take your long piece(12 feet) and fold it in half so you have a loop at the end. Then take 4 pieces of your 30in. and loop them around the long piece. See in the video below.

Second - Take the end of the long piece and loop it through the end. Then pull it tight so that it creates a closed circle, or star like look. See video below.
Third - You can now begin your knots! This will be a Double Half Hitch Knot. Make sure that you start with the longest string. This will be your main #1 string that you’ll use the whole time as you go around to create the coaster. Here is a tutorial from Mary in van city. You will repeat this knot over and over until the coaster is the size that you want it. Always using the #1 string!
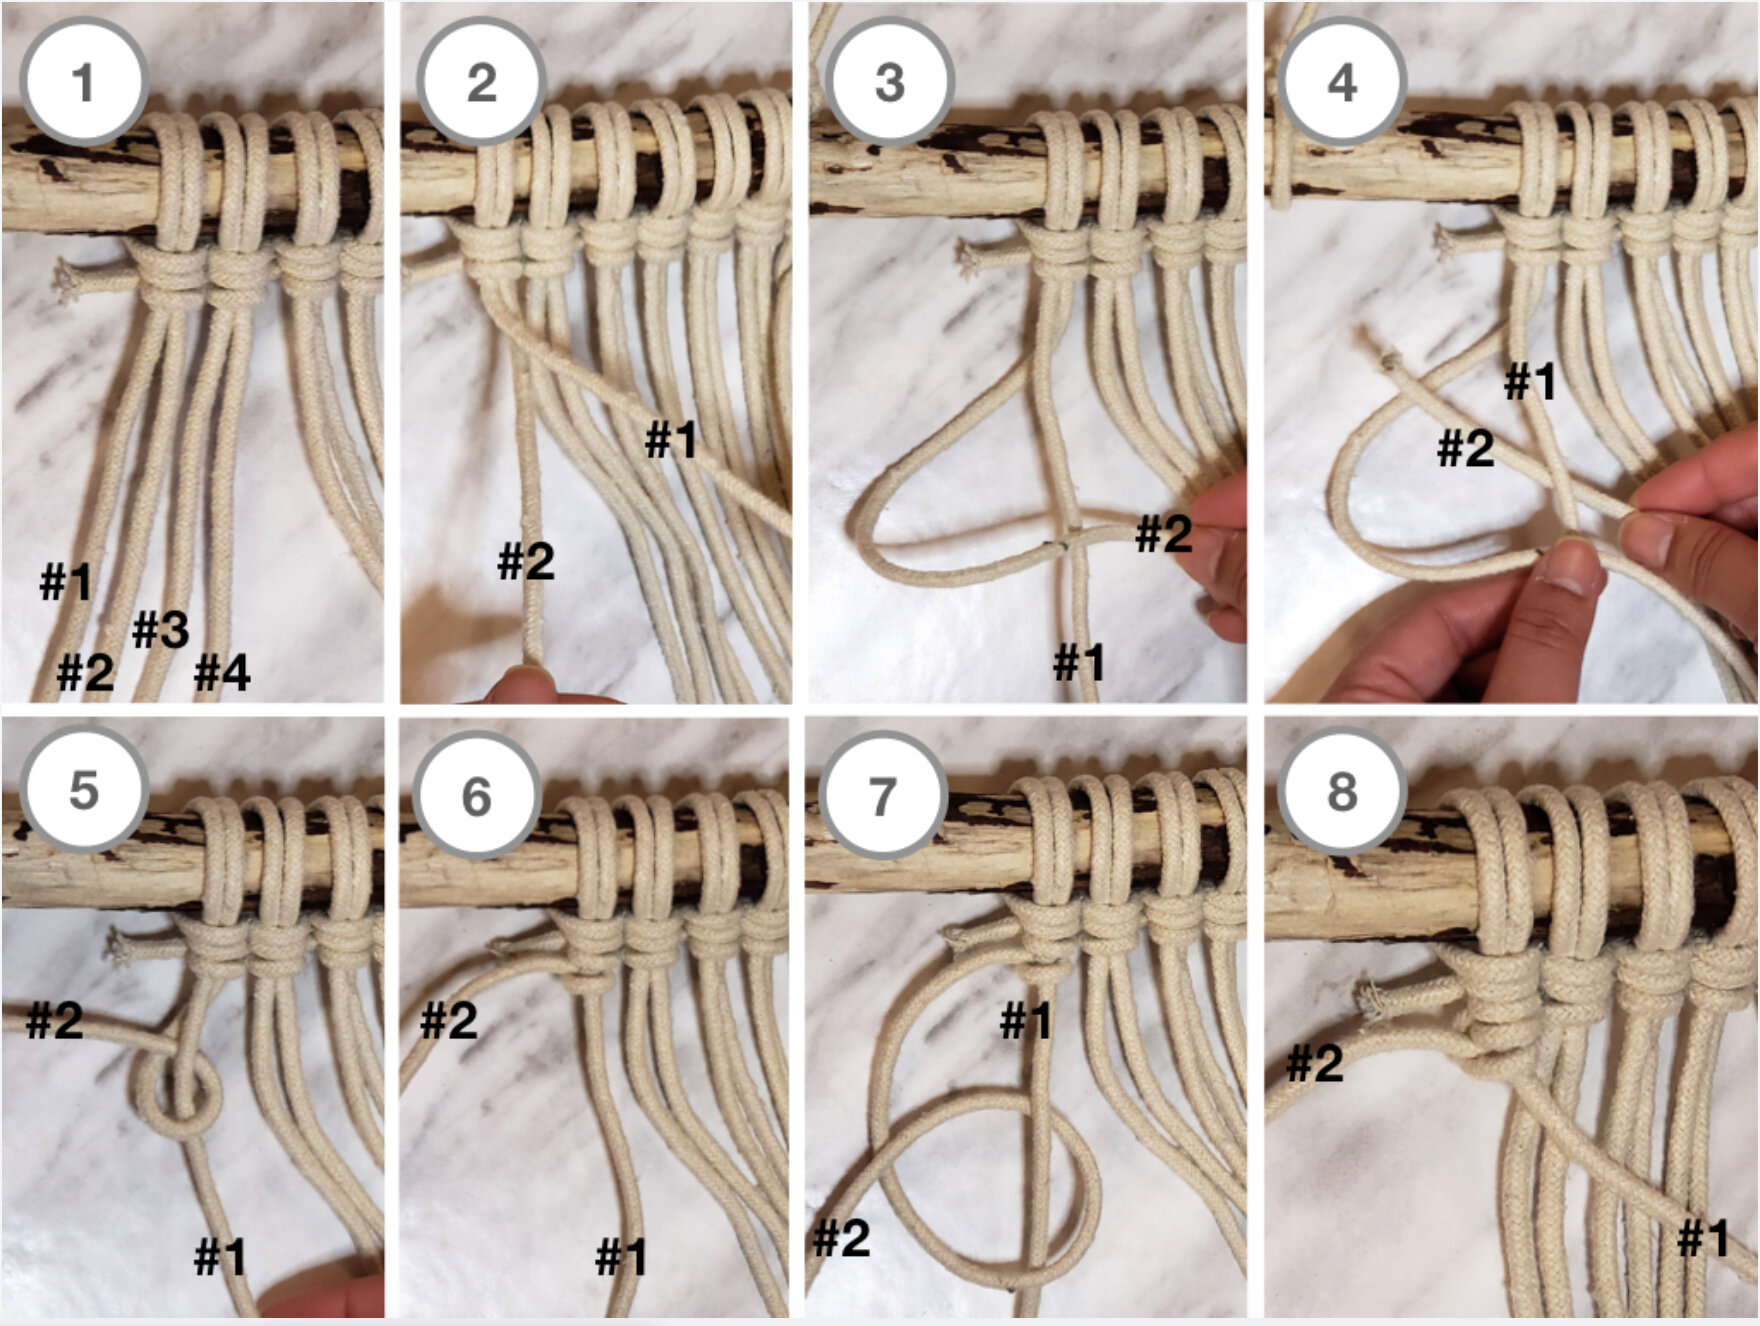
When you notice that there is a big gap to the next string, this is when you will start to add the other strings that you cut earlier. First start with the longer strings, then you can work your way down once you’ve used all your longer strings.
To add the string, you will do the same loop knot as before when you first started and put it on the main string #1 to add it. See video below.
Keep doing all of this until the coaster is the desired size. When you finish, you can take the main string #1 and tie it within the knots behind it so that it is hidden. See video below.

After you’re done, you can cut all the excess string off to the desired length. Then take a comb and brush out all the macrame strings.

Now Enjoy!!
