DIY Camping Box and Wood Burning
I have been wanting to build a camping box for SOOOOO long!!! We love to go camping and until now we’ve always put all of our stuff in a big bin. So whenever you need to find one little thing, you have to dig through pots and pans, and cups, and knives, and spatulas, all just to find that one thing that is always way at the bottom of the bin.. Very, very annoying every time you need to find something.
I’ve been nagging my husband for a while now once I saw that our good friend had made a camping box and how amazing it was to have everything organized and in on spot! All you needed to do was grab the box and know that everything you need is already in there and ready to go!
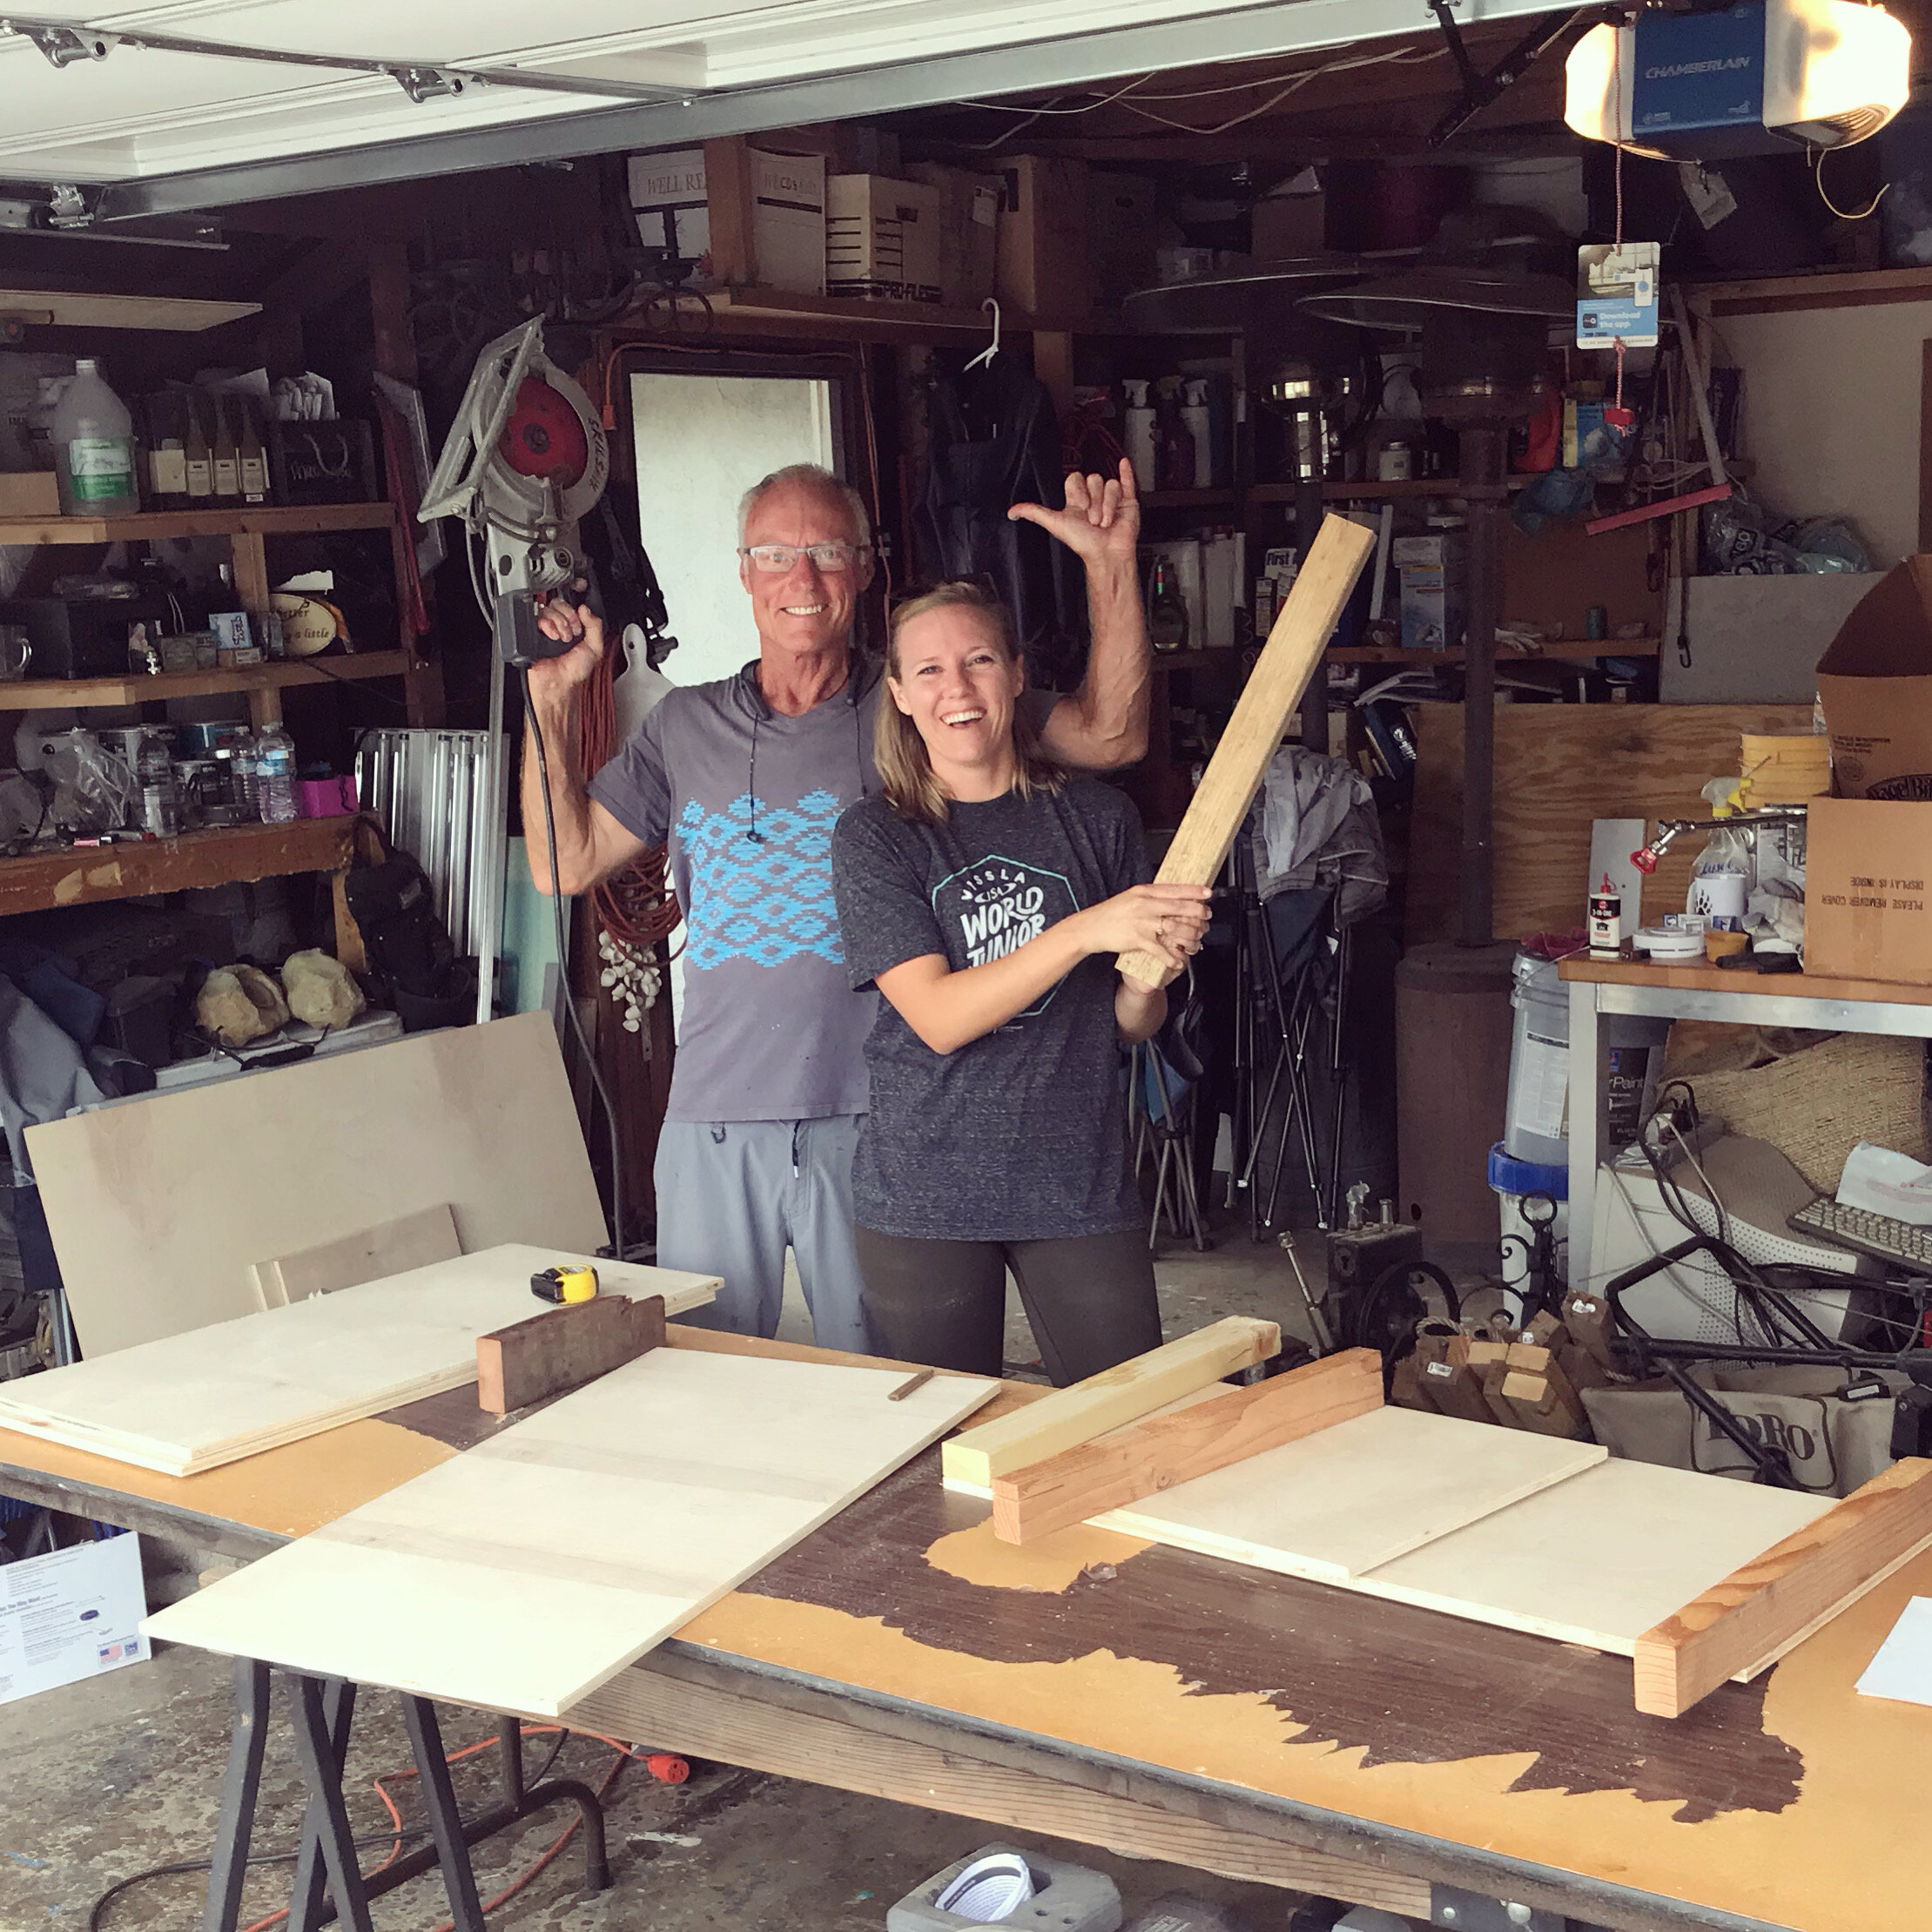
Soooo on my birthday, my husband secretly worked with my dad and got all of the supplies needed to build a camping box! I was so Stoaked!!
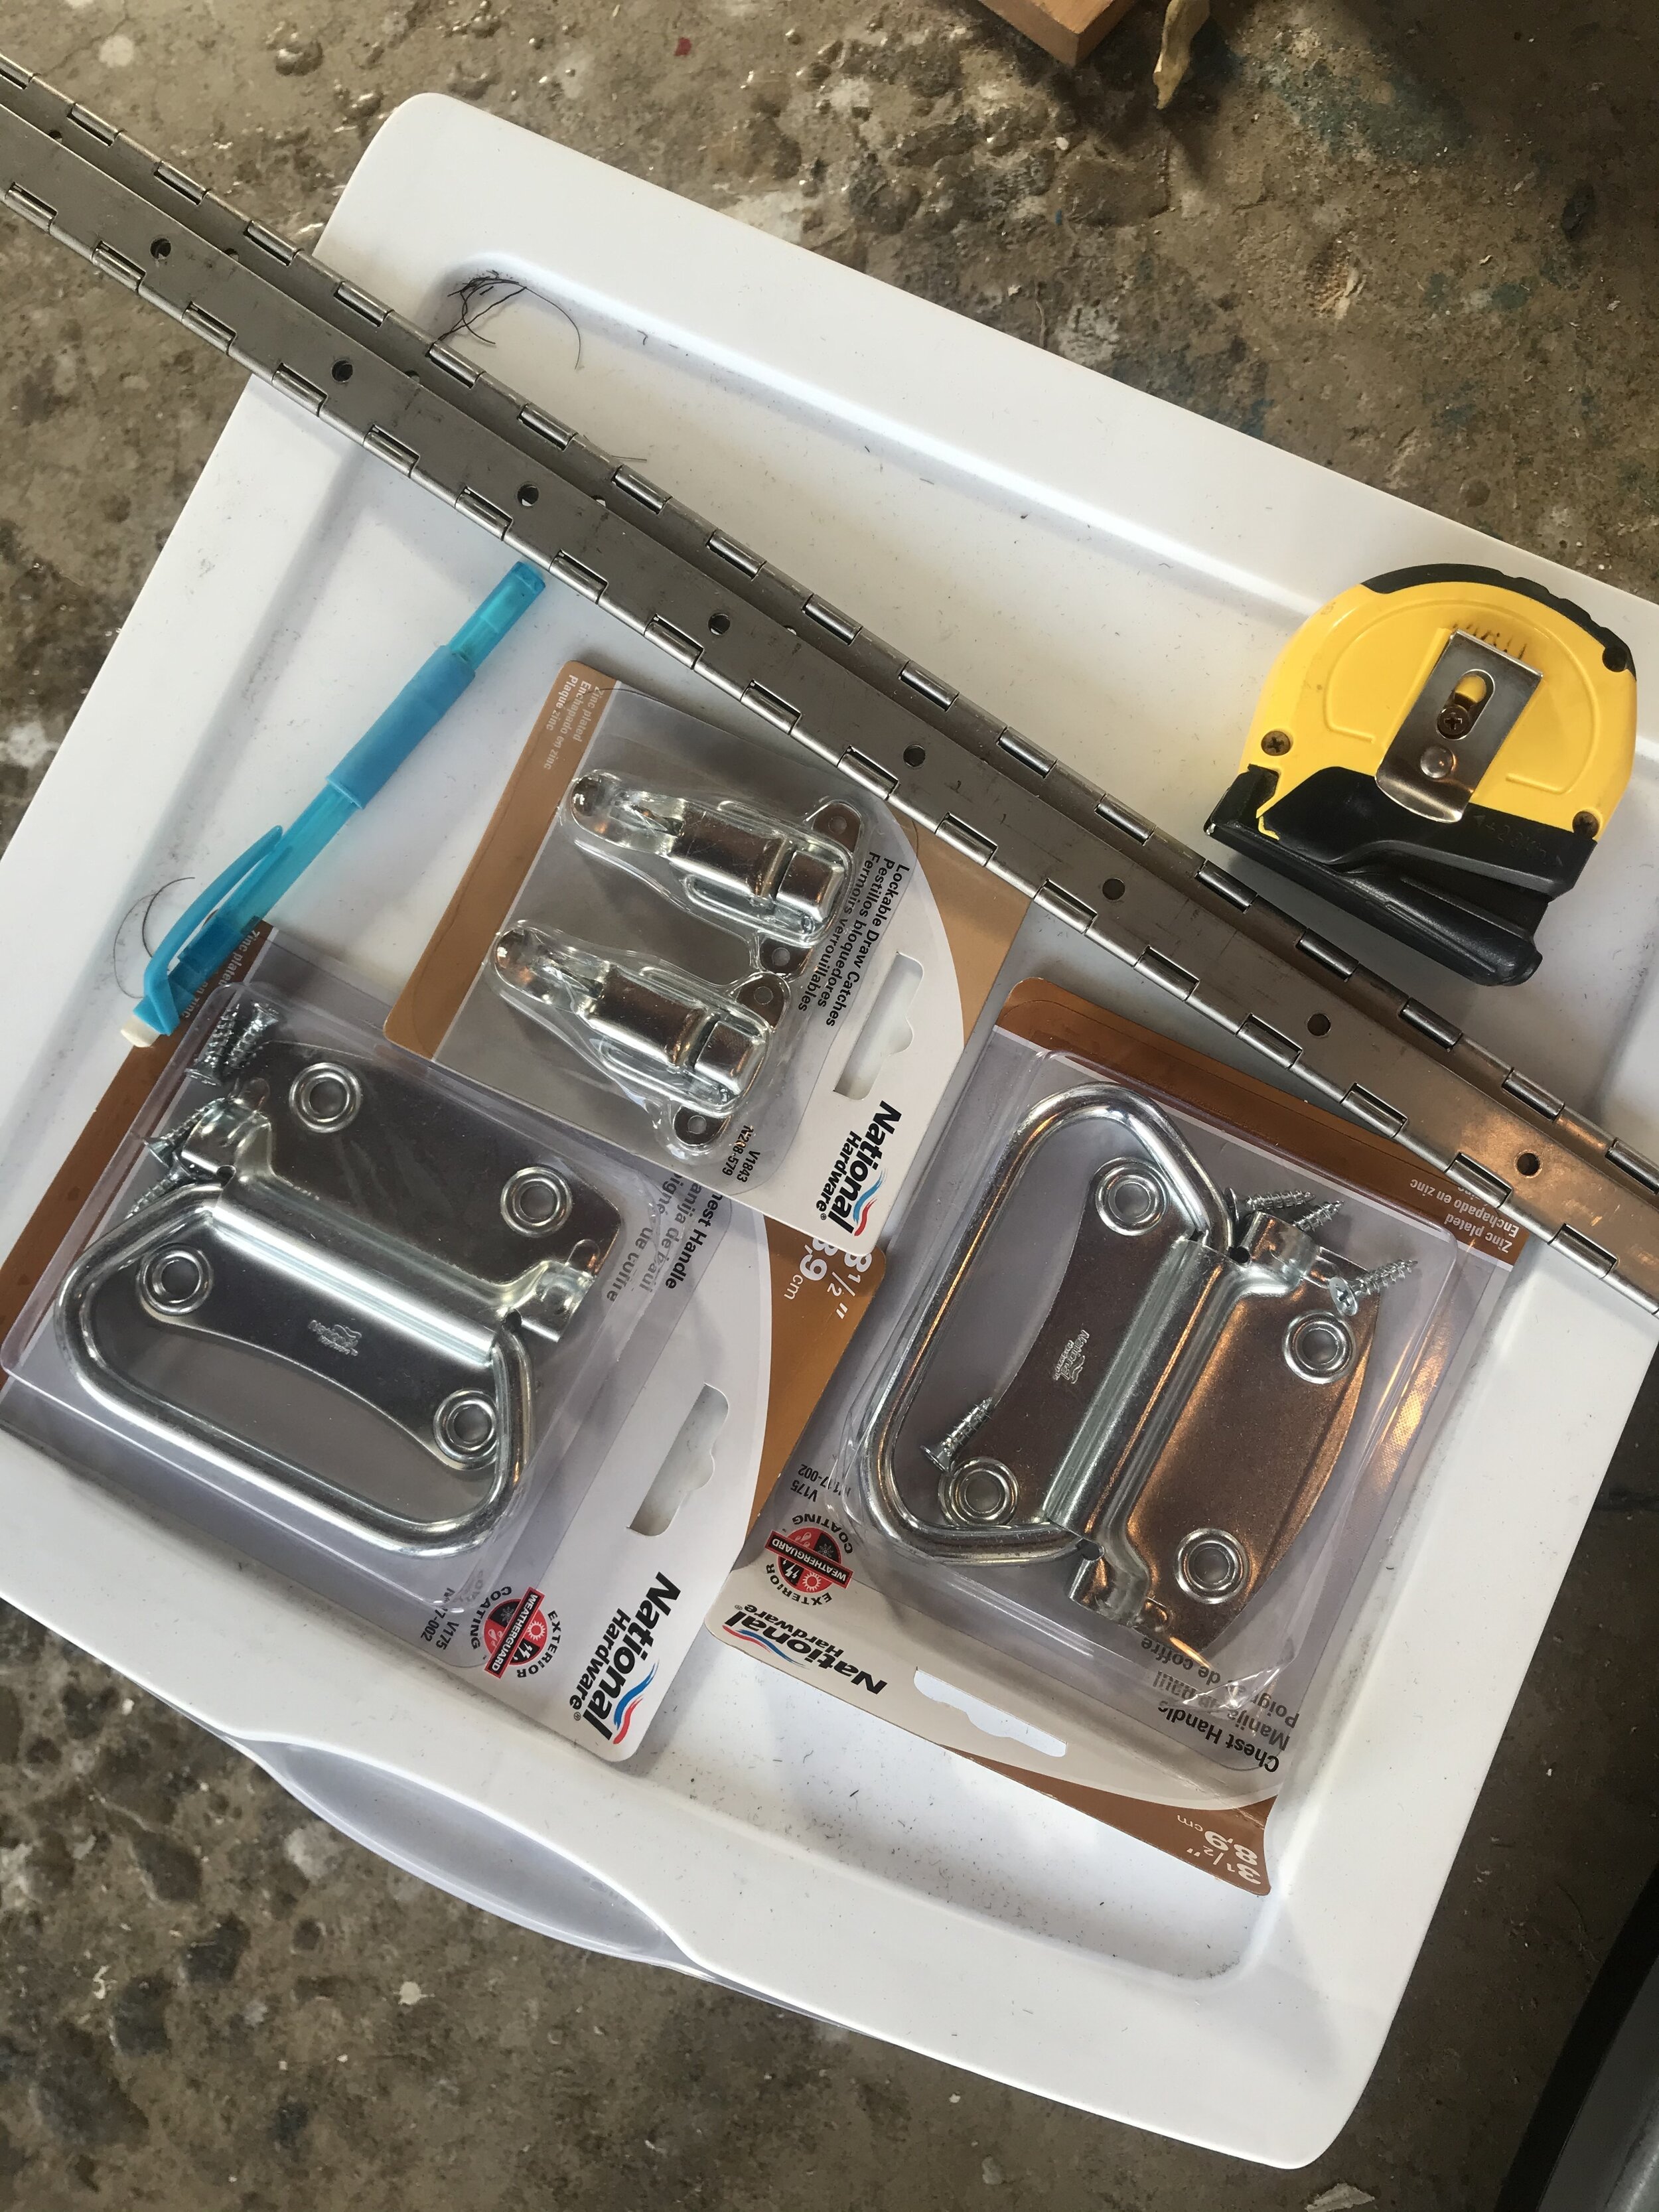
Here’s what they got me!
4x6 foot piece of Birch plywood - you can use a lower grade wood as well.
Two handles for each side
Two Lockable Draw Catches - So that I could open the box from each side.
My dad already had a nail gun, wood glue, table saw, and miter saw

Next was to try and figure out how to build the camping box. I feel like this was the hardest part for the whole thing! Box’s are way more complicated that I anticipated! But in the end we came up with these measurements that would ensure that everything would close correctly and nothing would be sticking out or hanging over, but also to ensure that it would be durable enough to be thrown around and cary a lot of weight. Here is what we came up with if you would like to do something similar!

After we cut all the wood to size we nailed the wood together so that we could see if it worked. After we found that it worked we screwed in the wood to reinforce it! Now it was starting to look like a camping box!

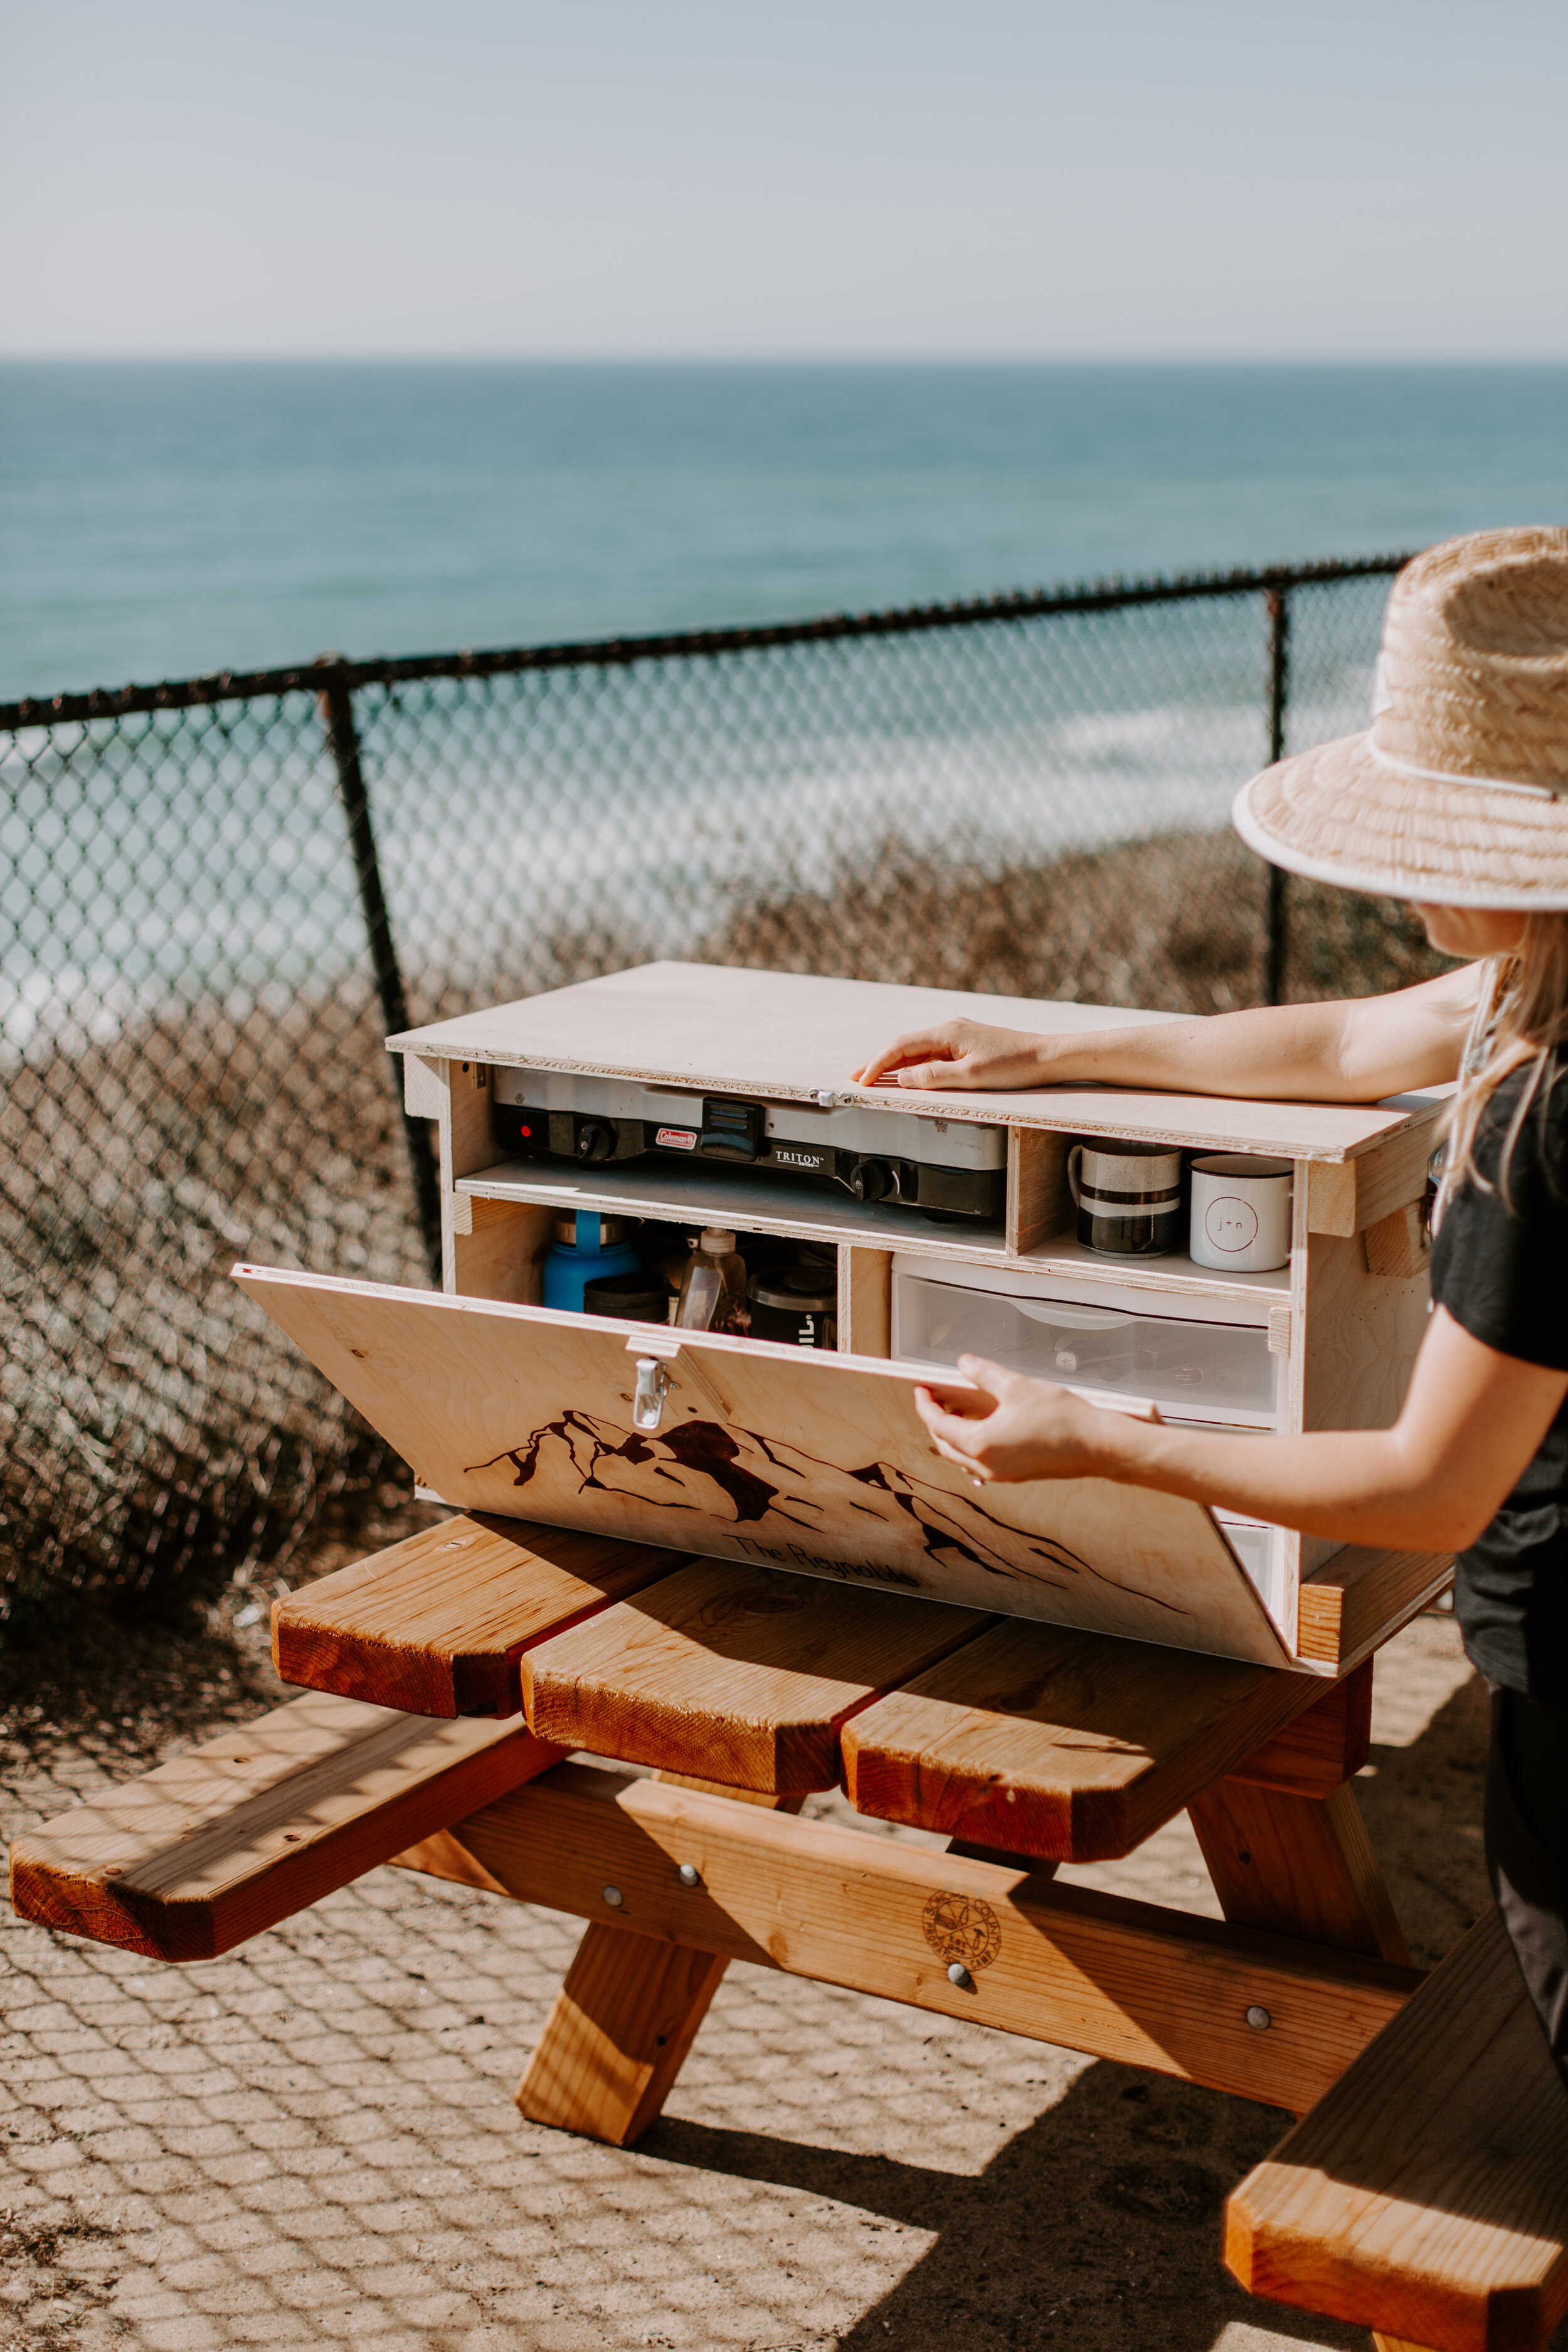
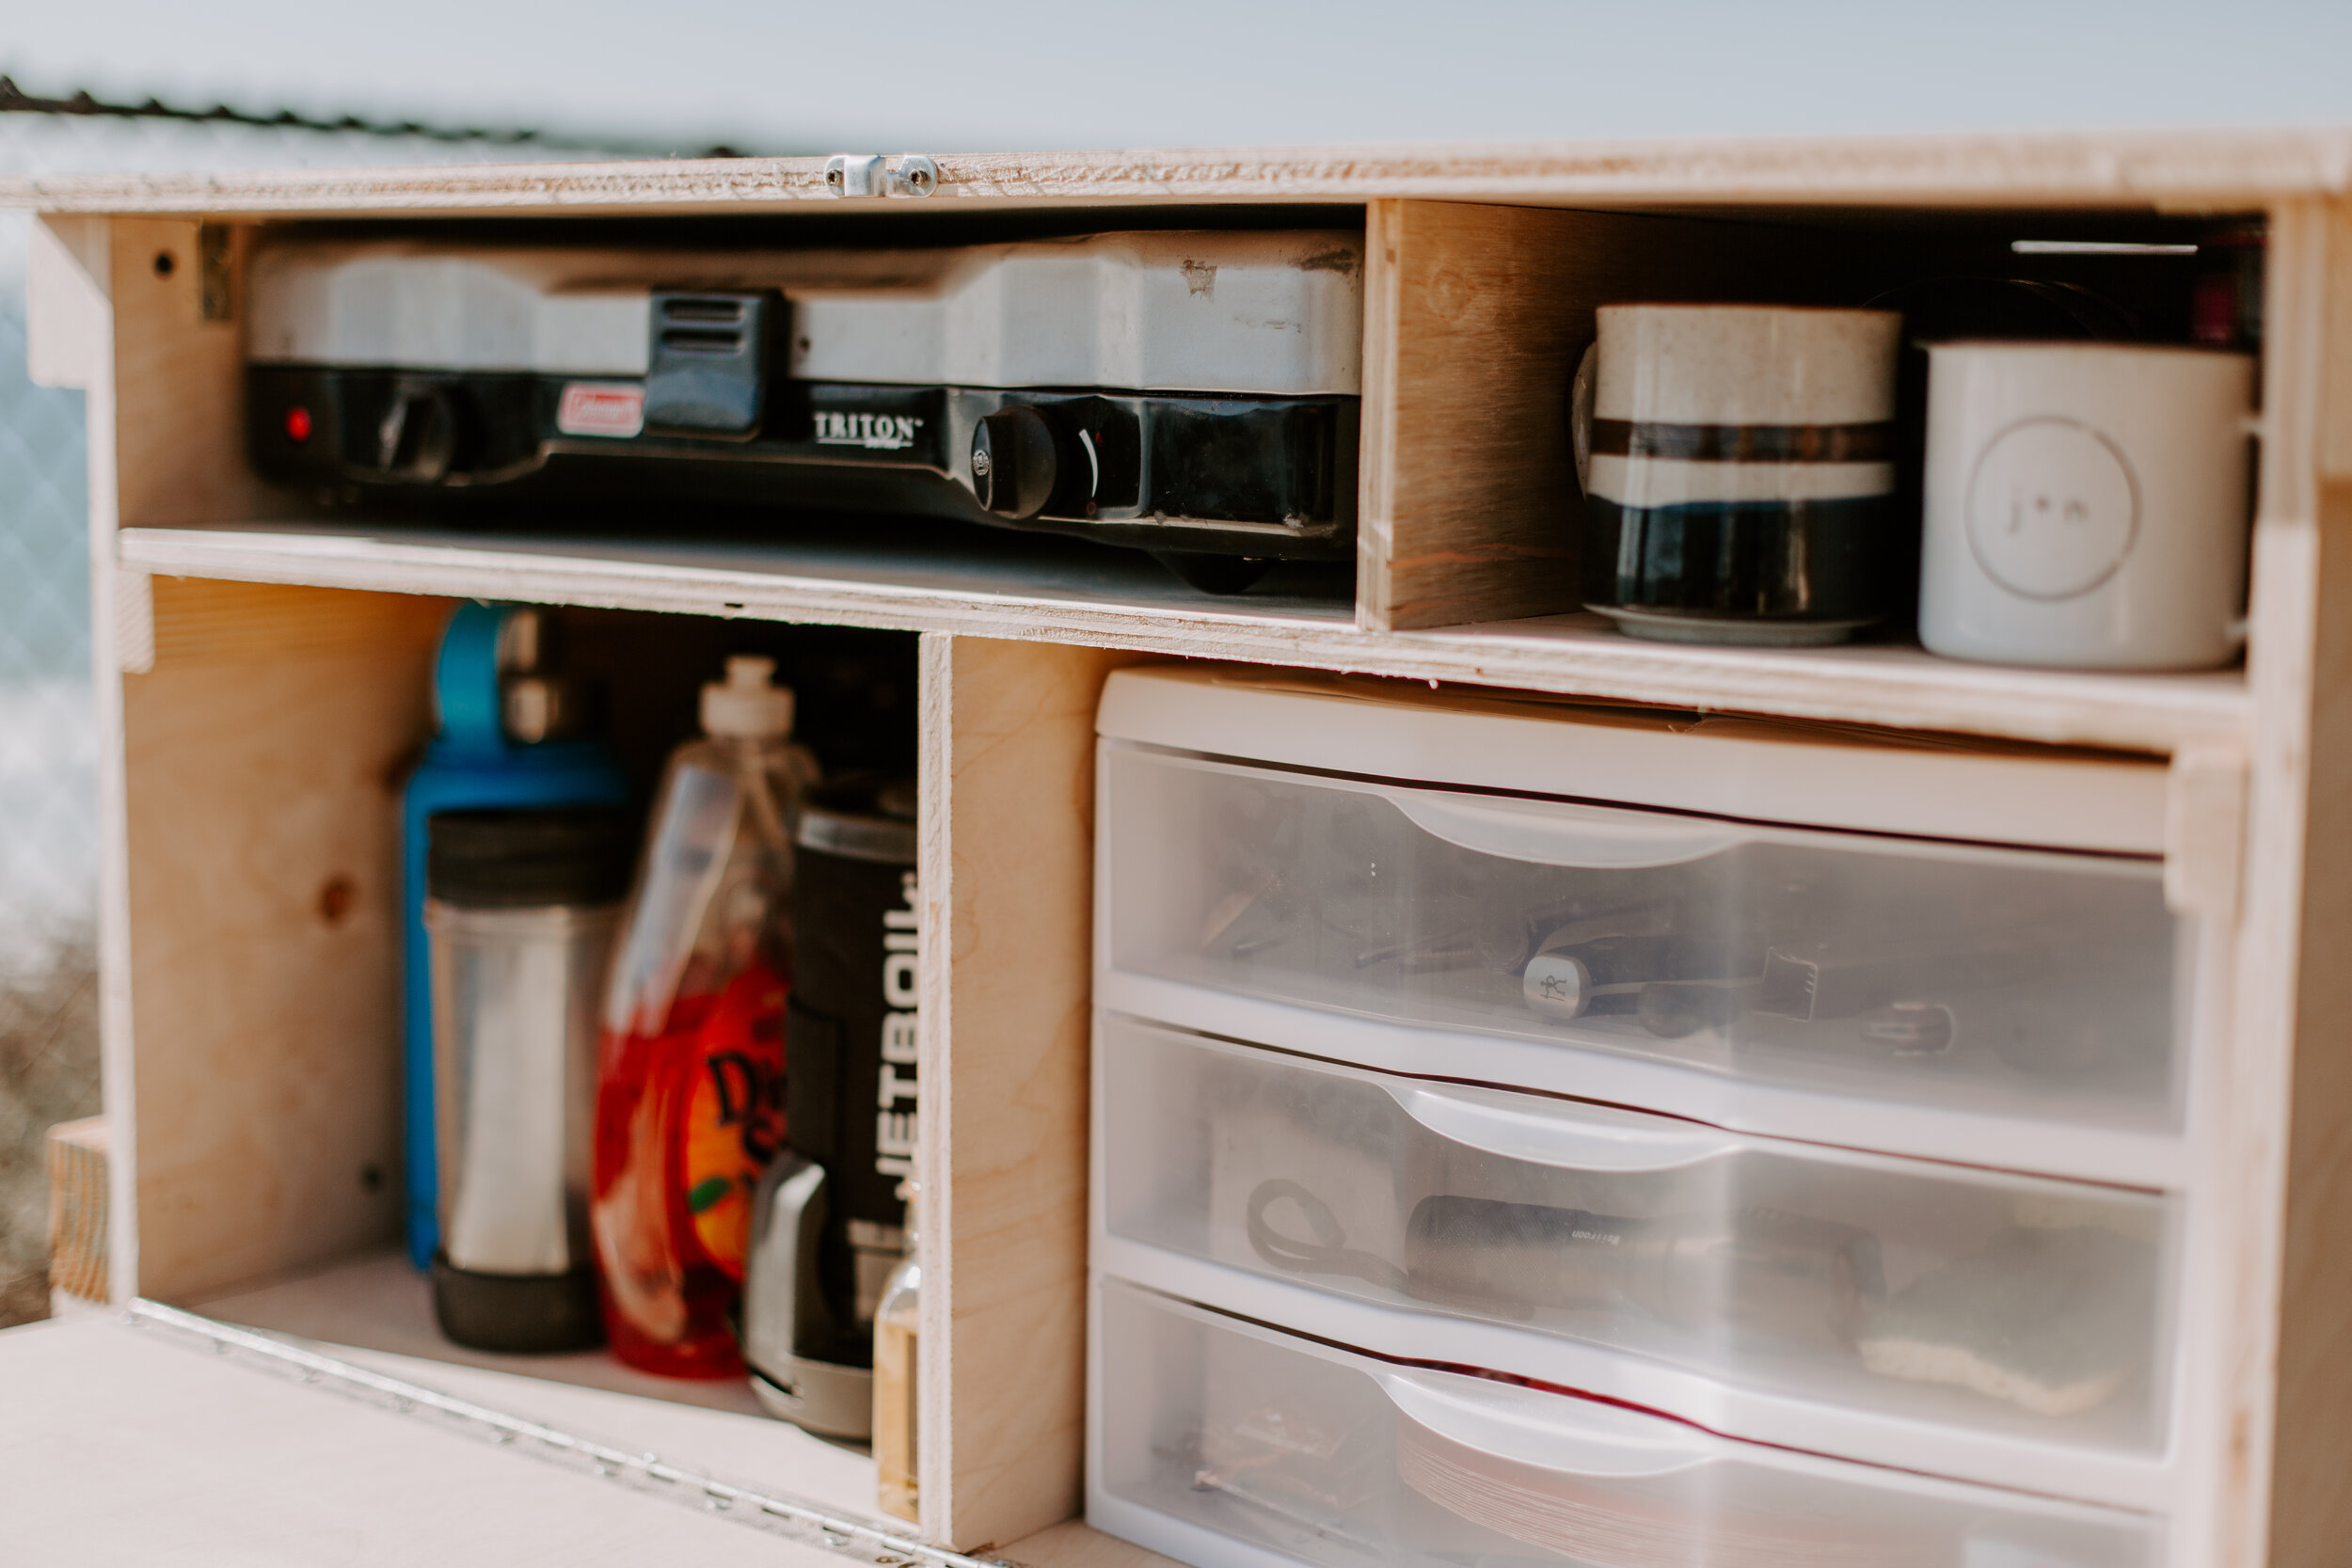
Next we added the sides that would swing open, and the shelves. I decided that I wanted both sides to swing open so that I could access things from both sides, instead of reaching back too far to grab something.
Once the sides were on, I took out all of our camping gear and decided where I wanted to place everything and how it would all fit. Then I could figure out where I wanted to have the shelves. Once I figured that out, it was pretty simple to put the shelves in. I used nails and wood glue, just so that it would be extra snug.


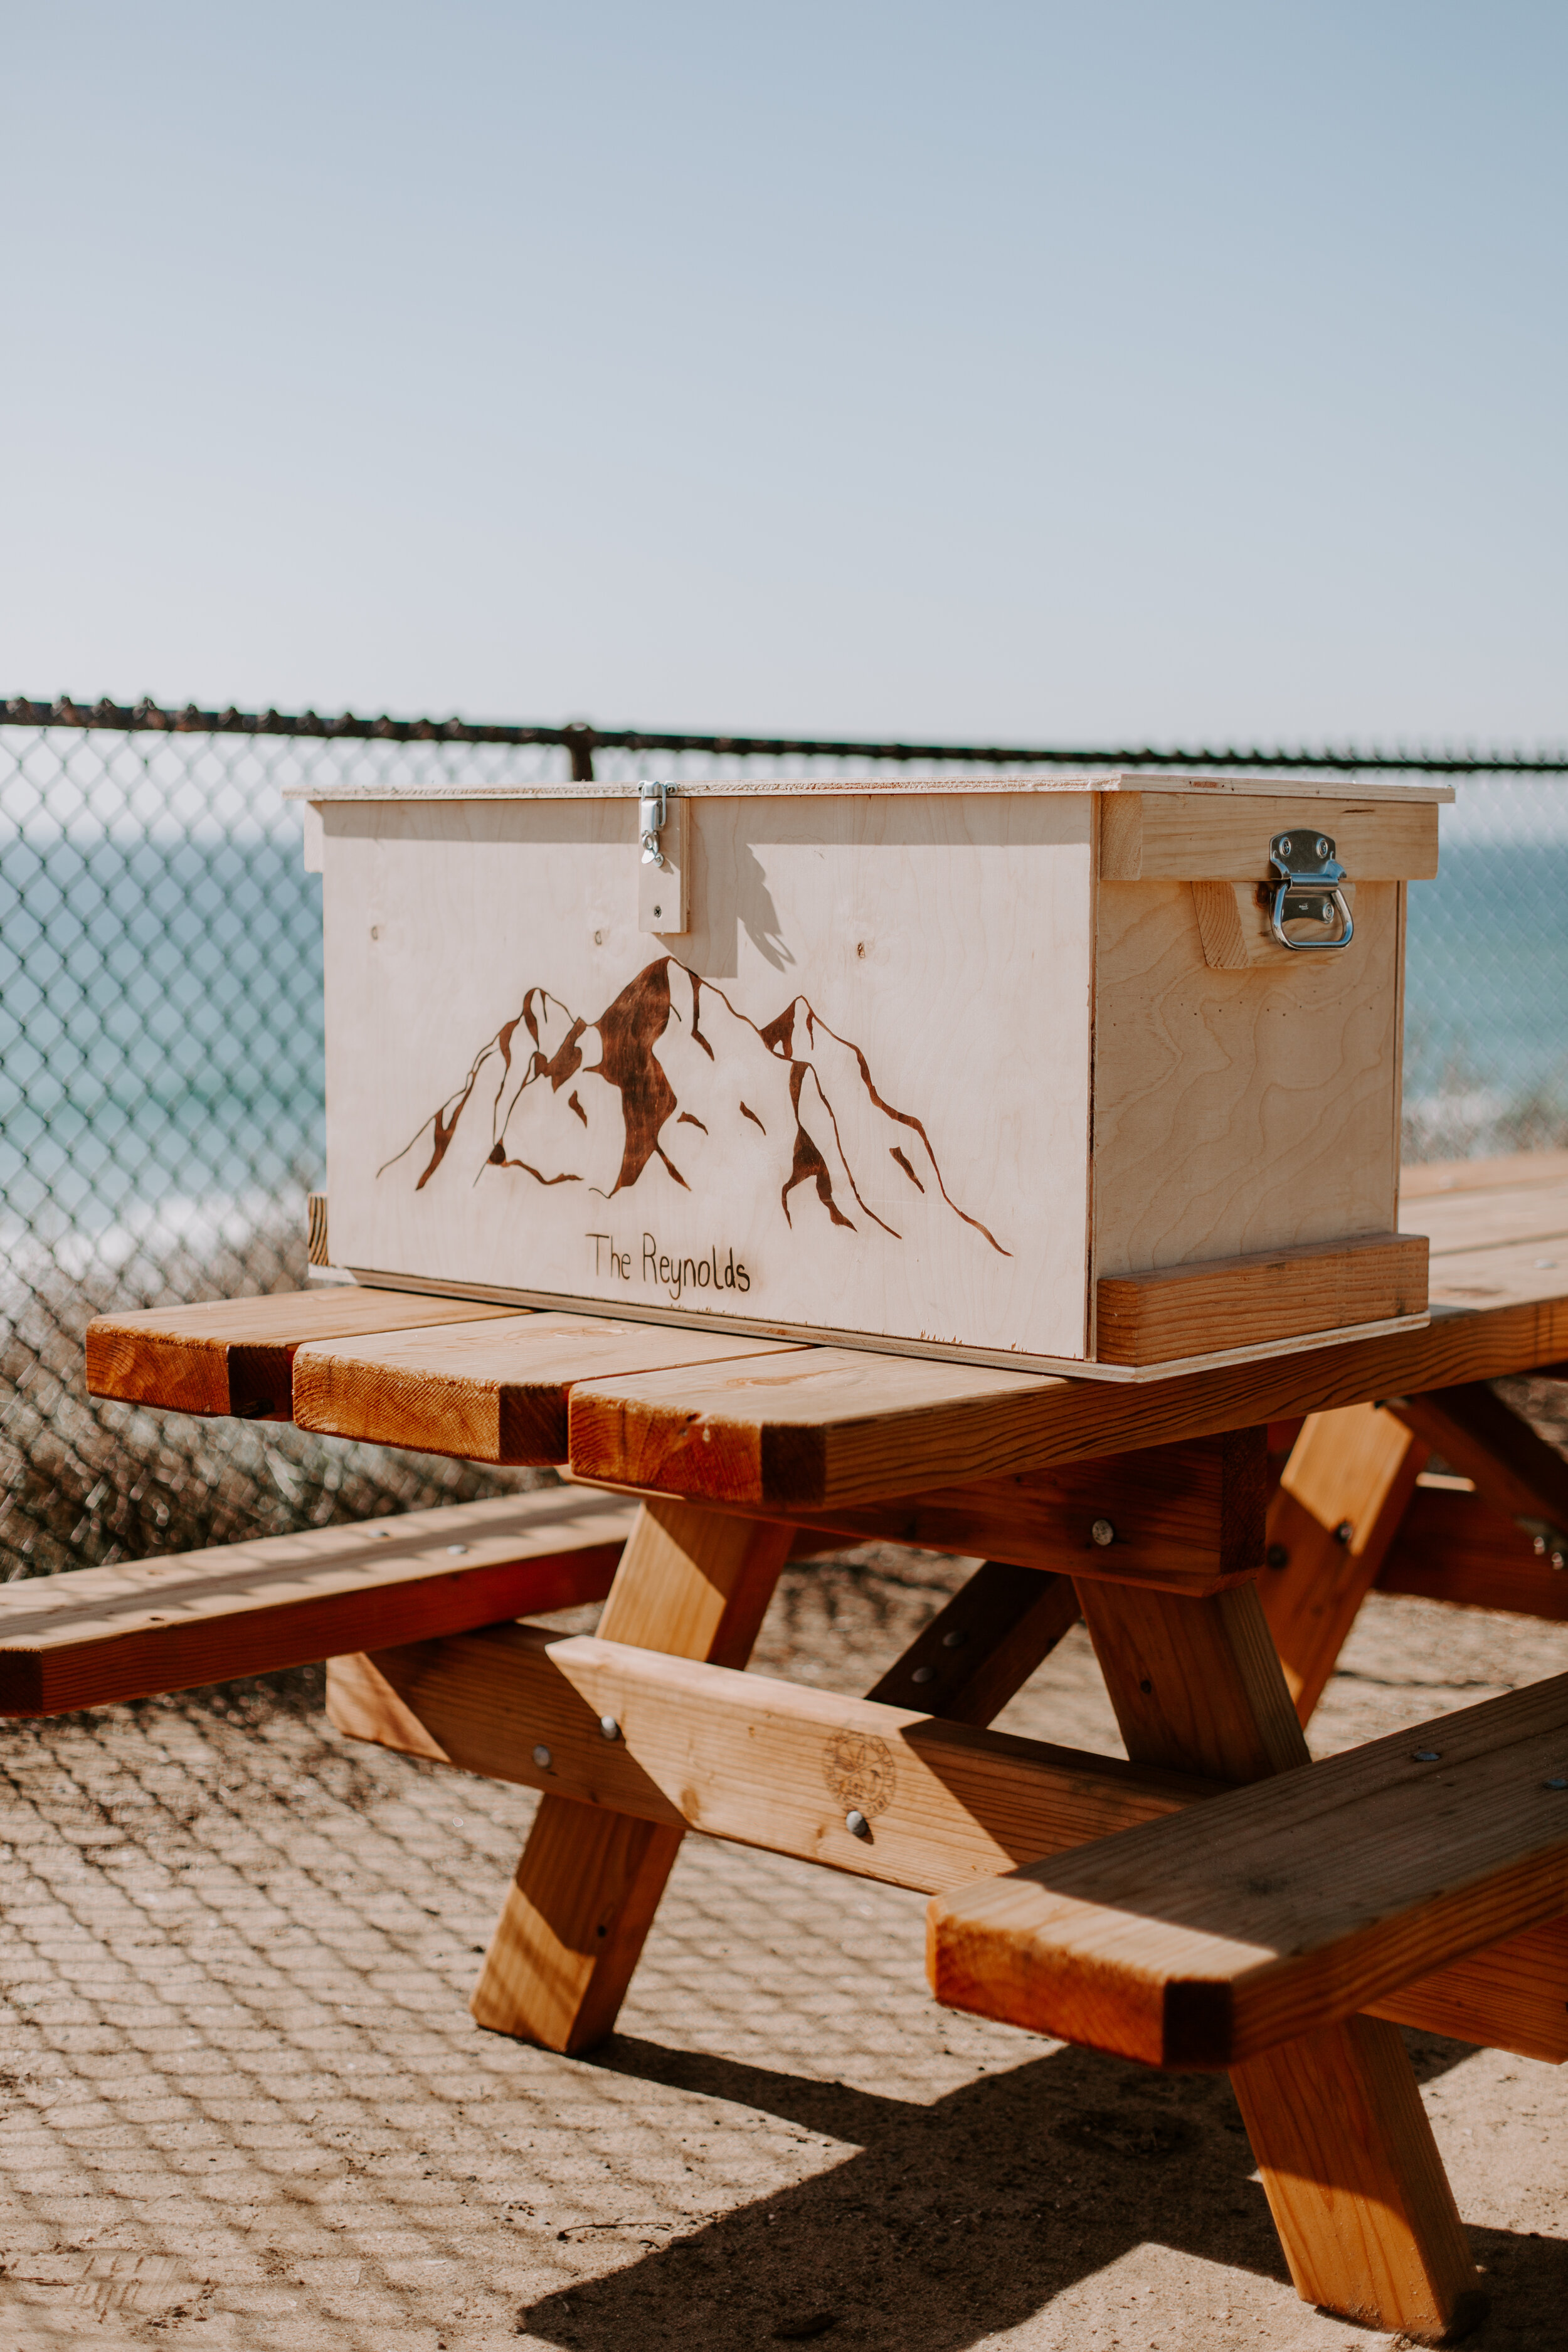
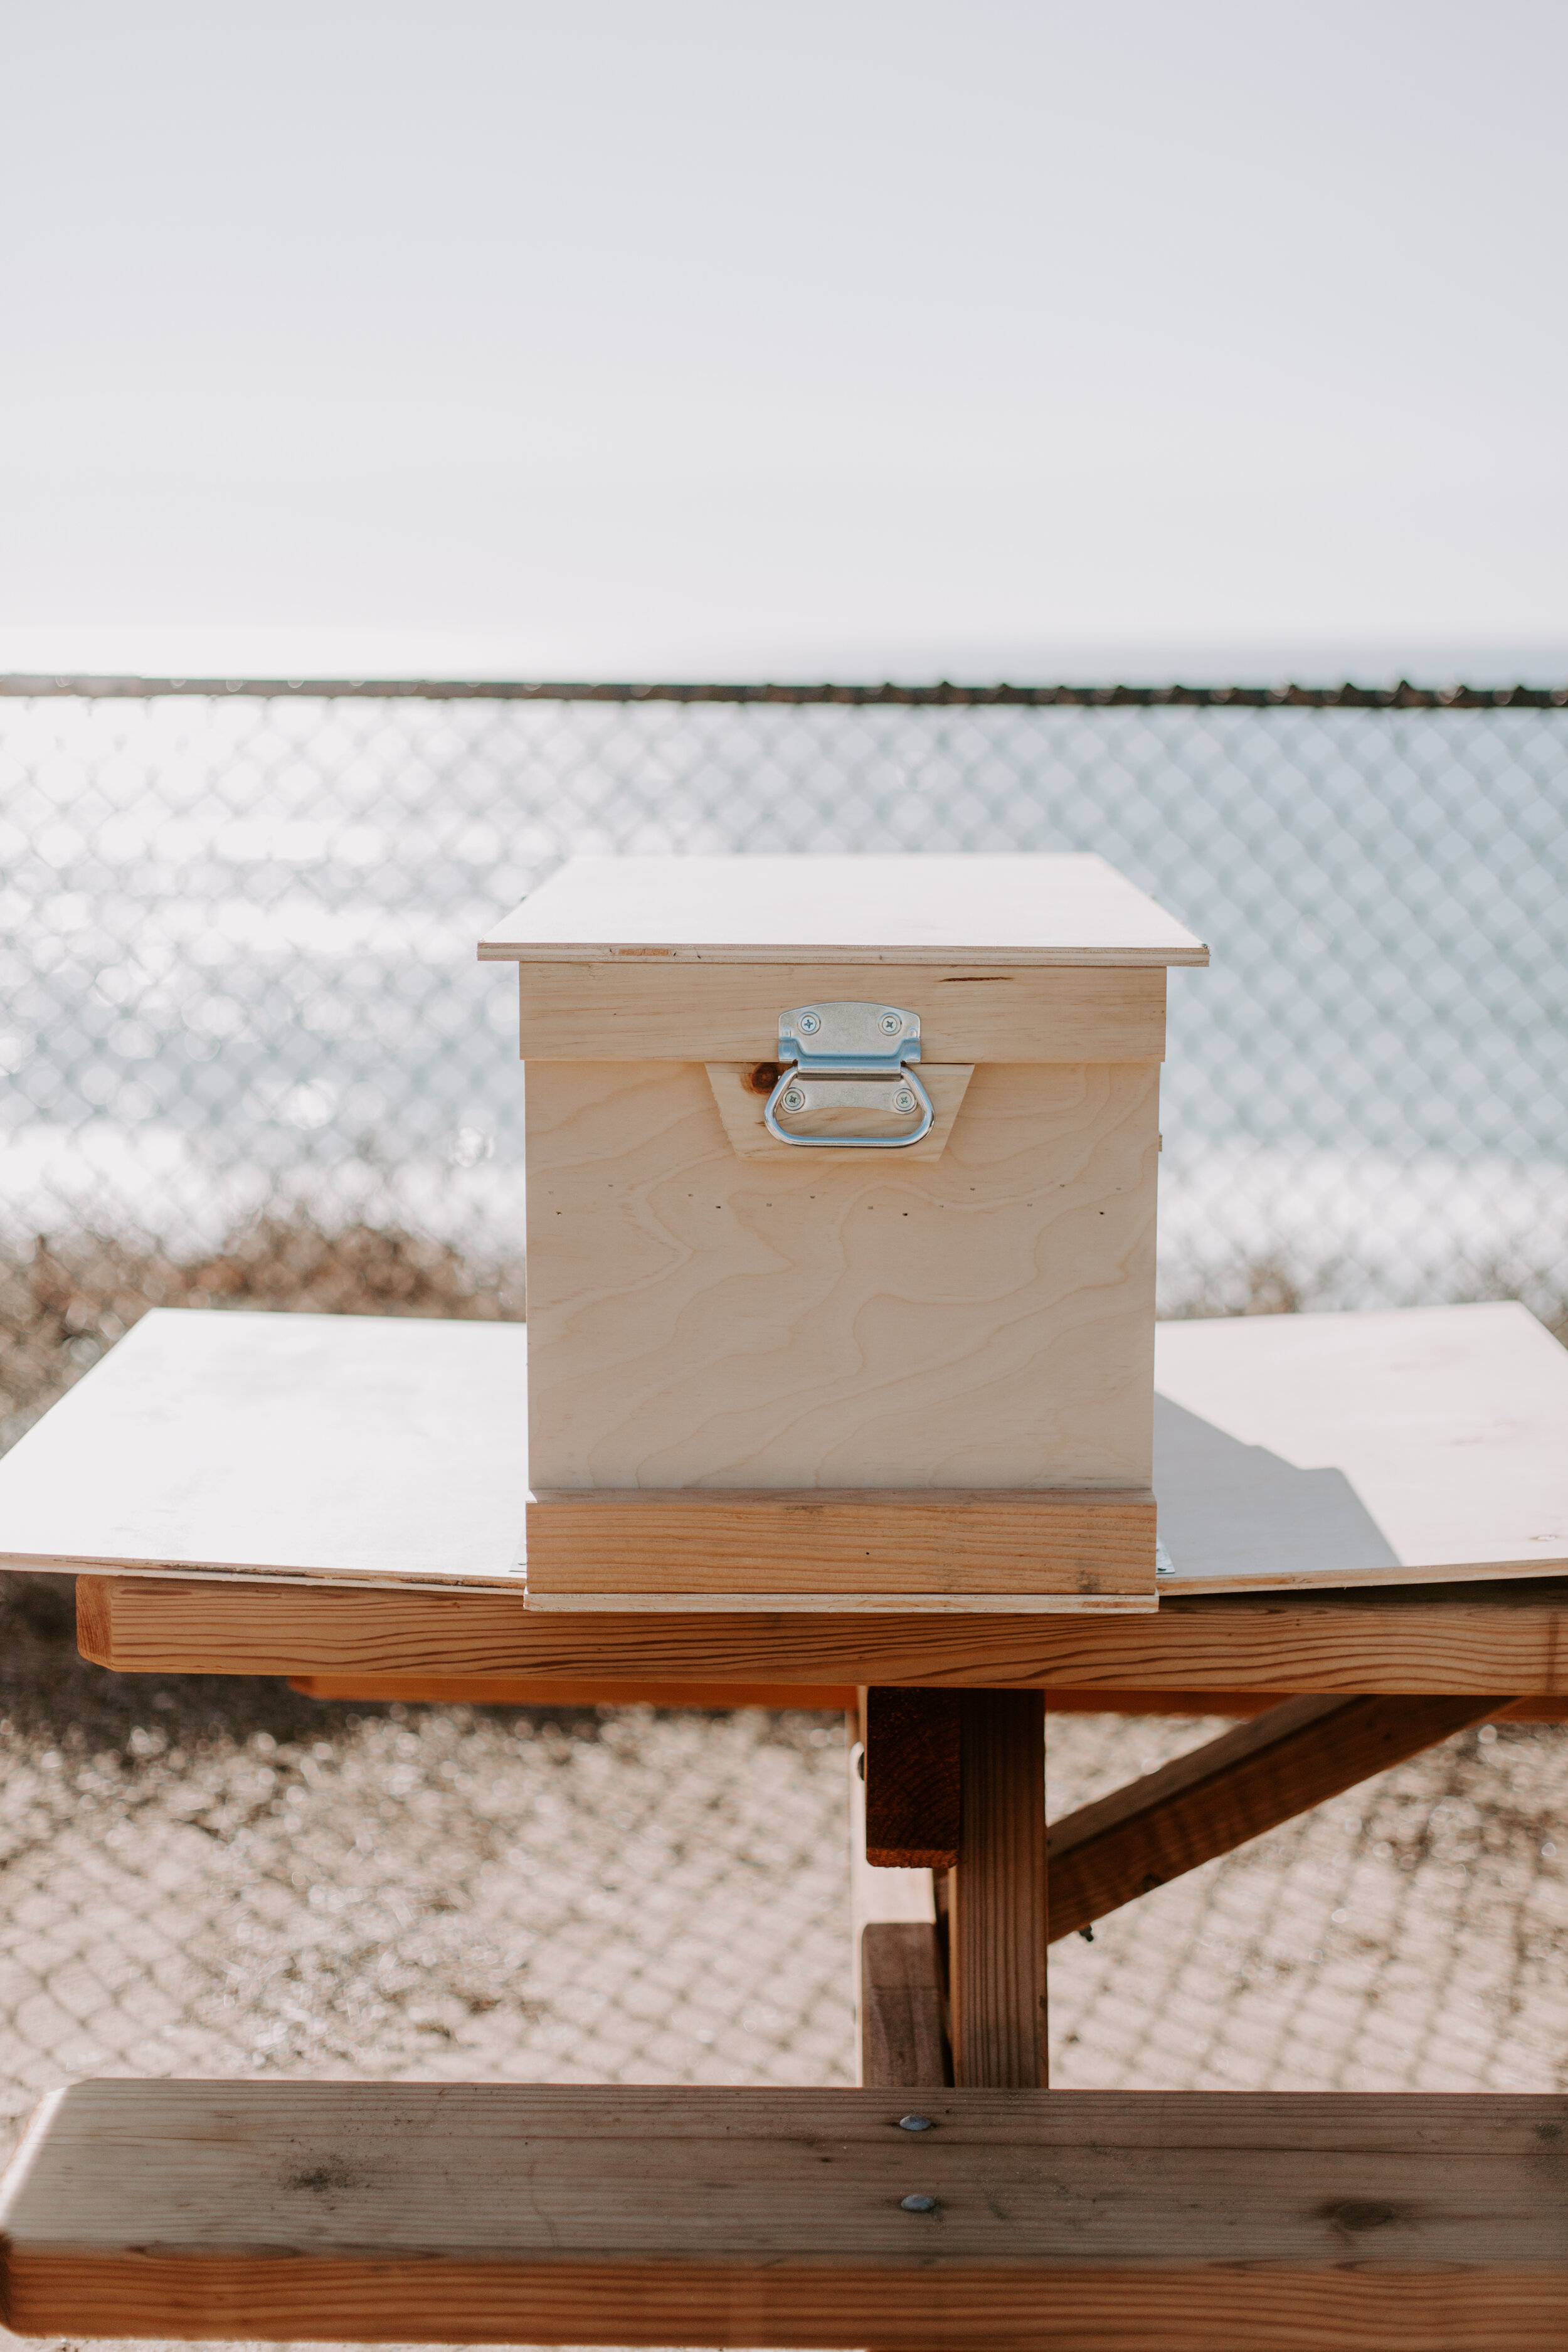
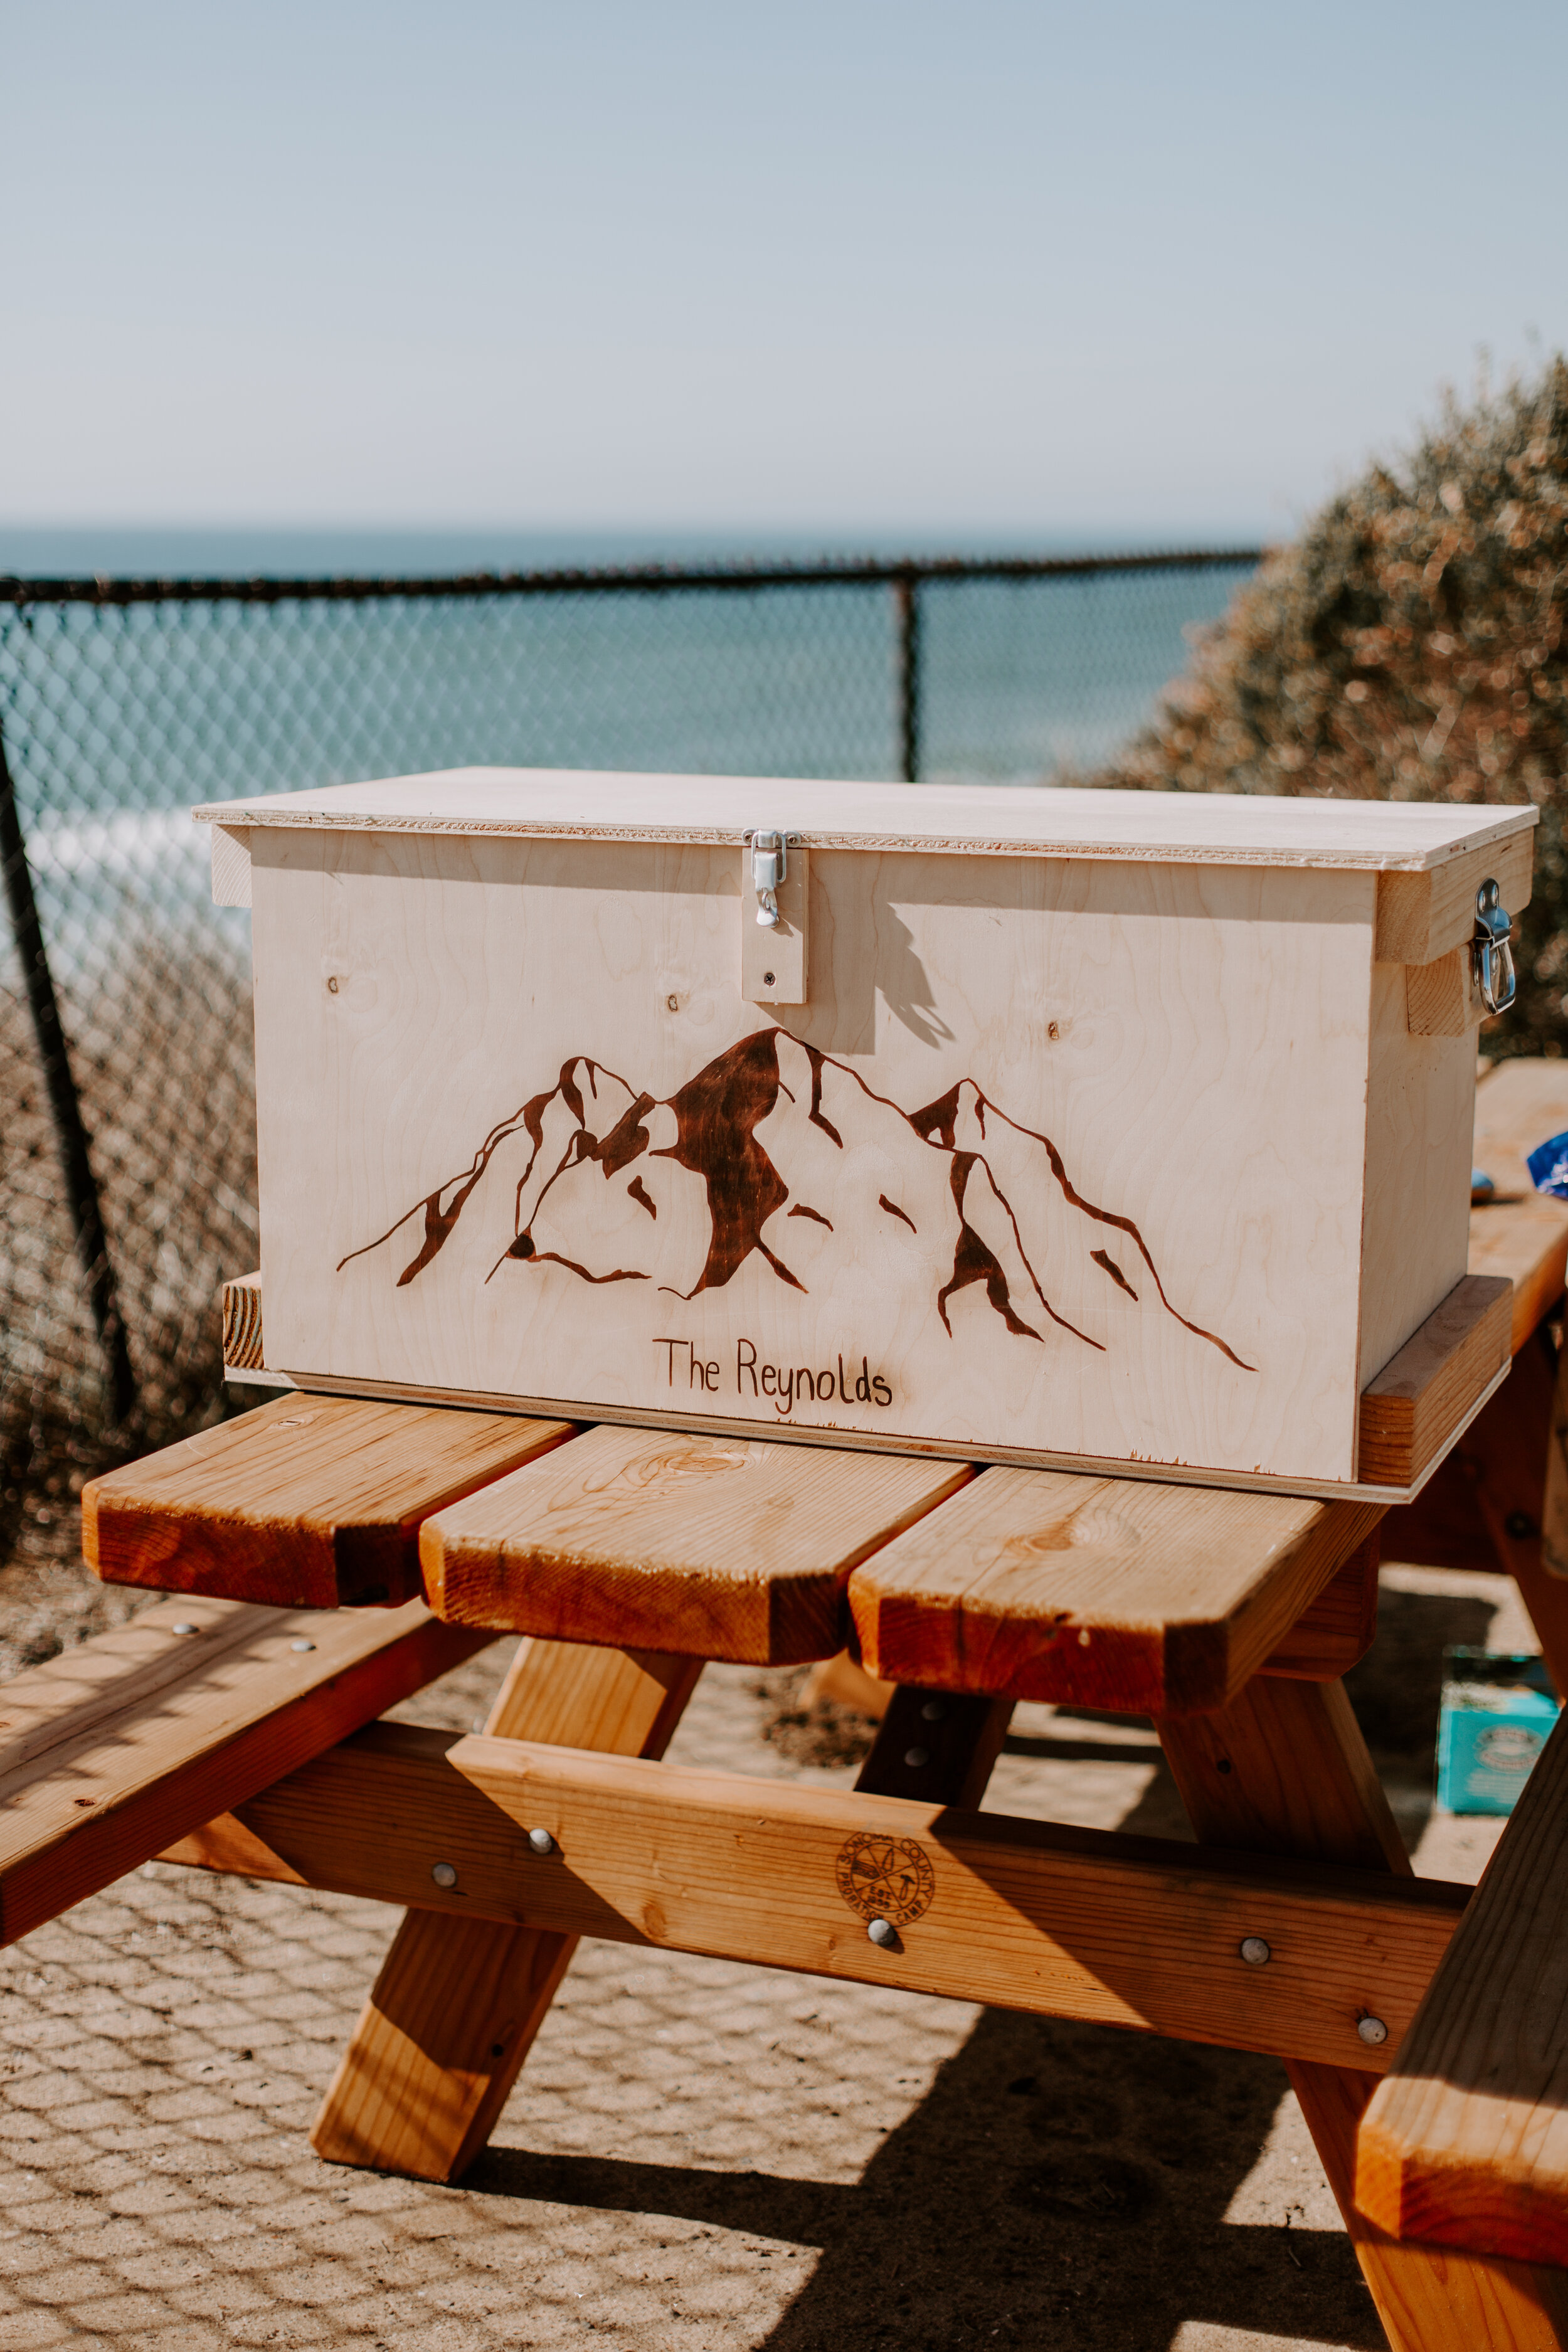
And now I have a camping box!!!
Last step was to make it look cool! And I knew just what I wanted to do!

I’ve always been into wood burning and the only bummer about it was that it would take soooooo long! Very time consuming and required a LOT of patience. Then I stumbled across something called a Scorch Marker! My Life changed!!!
What is a Scorch Marker you ask? It’s this pen that you can use to draw whatever you want on wood. Once you’re happy with what you’ve drawn, you take a heat gun and use it in the areas that you drew. The heat gun will ONLY burn where you used the marker! Its like magic! And the best part is, it’s SO fast!
I’ve seriously been telling everyone I know about this! It is the best thing for crafts with wood.
Here’s a little video of me burning the camping box!